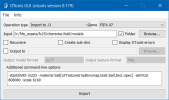
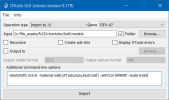
PES 2021 ball models
1) Download Blender
In this tutorial, Blender 2.93 is used. It may happen that you will need to have different Blender versions, because some add-ons may or may not work with different Blender versions. So the best way is to download Blender "portable" version (zip-packed) and unzip it to some "general" Blender folder on your PC (like C:Program Files\Blender Foundation):
2) Open Blender and remove unneeded objects in initial scene: Ctrl+A > Del, File > Defaults > Save startup file > Save startup file.
3) Download pes-fmdl add-on for Blender. The add-on works well only with Blender 2.8.x or 2.9.x.
In Blender, go to Edit > Preferences > Add-Ons, press Install, select downloaded add-on.
Enable installed add-on:
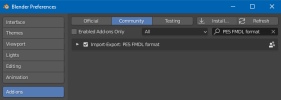
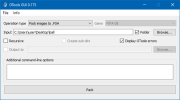
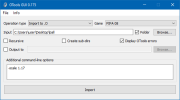
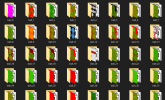
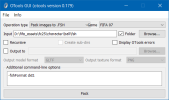
4) Extract .fmdl file from .fpk archive with GzsTool. Convert PES .ftex files to .dds with PES 2021 Ftex Converter.
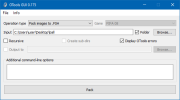
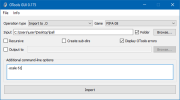
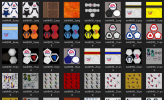
As a result, you will have: "ball.fmdl", "ballX_c_bsm_alp.dds", "ballX_n_nrm.dds", "ballX_s_srm.dds". The last file is not needed.
5) Download and install xNormal:
Open it, go to Tools > Tangent-space normal map to cavity map. Drag the "ballX_n_nrm.dds" file to the left side of the tool. In Swizzle coordinates, change Z+ to Z-. In Method, select SPD. In Contrast, select 2.0. You can also try with other parameters to achieve better results, if needed. Press RMB on the right side of the tool, select Generate.
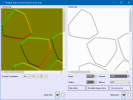
Press RMB on the right side of the tool, select Save cavity map. Save it as "map.tga".
6) Open "ballX_c_bsm_alp.dds" in Photoshop (DDS plugin for Photoshop is required - or - convert .dds to .tga with some tool and then open it).
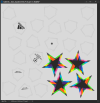
Open saved "map.tga" in Photoshop.
Put "map.tga" image on top of "ballX_c_bsm_alp.dds" image with "Multiply" blend.
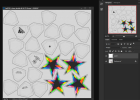
Flatten the image (Layer > Flatten Image). If you want to optimize the texture for the game, resize the image to 512x512 (recommended), or leave it 1024x1024 (but not higher) if you want better quality.
Save the image as "ball.tga" (TGA 24 bits/pixel).
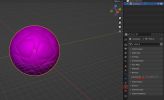
7) Open .fmdl in Blender: on right side, open Scene Properties and in FMDL/IO group, press Import Fmdl, select "ball.fmdl".
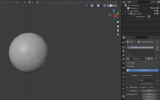
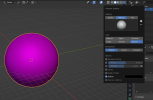
Now what to do: delete Desktop\ball node (RMB on node name > Delete) because we don't need it; rename MESH_ROOT object and mesh to "ball" (not really needed, just looks better); in Material Properties, remove the material slot ("-" button) then press the New button.
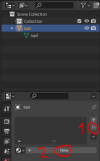
Rename the material (double-click on material name to rename it) to:
FIFA 07: "ball [LitTextureIrradEnvmap,tex1:spec]"
FIFA 08/10: "ball [LitTexture2x]"
The value inside [] is a specific shader name for this material, and additional texture names.
You can also experiment with other shaders, and even use multiple materials/shaders on the ball mesh.
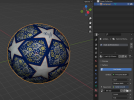
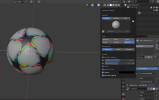
Now in Base Color, select Image Texture, and open "ball.tga".
Change render properties if you don't see the texture.
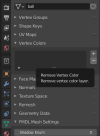
In Object Data Properties, in Vertex Colours, delete all vertex color slots ("-" button).
Now press A (select all) > Ctrl+A >All Transforms.
Now go to File > Export > glTF 2.0, create new folder for the exported file, select Format: glTF Separate, use filename "m222__X.gltf", where X is a ball model ID which you want to replace, Export.
-----
Now, only for FIFA 07: change material name to "ball [LitTexture2x]" (we don't want any reflections on far-distance model).
-----
8) Export again, but use filename "m316__X.gltf" (far-distance model).
As a result, you will have: "m222__X.gltf", "m222__X.bin", "m316__X.gltf", "m316__X.bin", "ball.png".
9) Open the folder with .gltf file and delete "ball.png". Copy "ball.tga" to this folder and rename this copied "ball.tga" to "ball@t99__X.tga", where X is a ball model ID which you want to replace.

1) Download Blender
In this tutorial, Blender 2.93 is used. It may happen that you will need to have different Blender versions, because some add-ons may or may not work with different Blender versions. So the best way is to download Blender "portable" version (zip-packed) and unzip it to some "general" Blender folder on your PC (like C:Program Files\Blender Foundation):
2) Open Blender and remove unneeded objects in initial scene: Ctrl+A > Del, File > Defaults > Save startup file > Save startup file.
3) Download pes-fmdl add-on for Blender. The add-on works well only with Blender 2.8.x or 2.9.x.
In Blender, go to Edit > Preferences > Add-Ons, press Install, select downloaded add-on.
Enable installed add-on:

4) Extract .fmdl file from .fpk archive with GzsTool. Convert PES .ftex files to .dds with PES 2021 Ftex Converter.
As a result, you will have: "ball.fmdl", "ballX_c_bsm_alp.dds", "ballX_n_nrm.dds", "ballX_s_srm.dds". The last file is not needed.
5) Download and install xNormal:

Press RMB on the right side of the tool, select Save cavity map. Save it as "map.tga".
6) Open "ballX_c_bsm_alp.dds" in Photoshop (DDS plugin for Photoshop is required - or - convert .dds to .tga with some tool and then open it).

Open saved "map.tga" in Photoshop.
Put "map.tga" image on top of "ballX_c_bsm_alp.dds" image with "Multiply" blend.

Flatten the image (Layer > Flatten Image). If you want to optimize the texture for the game, resize the image to 512x512 (recommended), or leave it 1024x1024 (but not higher) if you want better quality.
Save the image as "ball.tga" (TGA 24 bits/pixel).
7) Open .fmdl in Blender: on right side, open Scene Properties and in FMDL/IO group, press Import Fmdl, select "ball.fmdl".

Now what to do: delete Desktop\ball node (RMB on node name > Delete) because we don't need it; rename MESH_ROOT object and mesh to "ball" (not really needed, just looks better); in Material Properties, remove the material slot ("-" button) then press the New button.

Rename the material (double-click on material name to rename it) to:
FIFA 07: "ball [LitTextureIrradEnvmap,tex1:spec]"
FIFA 08/10: "ball [LitTexture2x]"
The value inside [] is a specific shader name for this material, and additional texture names.
You can also experiment with other shaders, and even use multiple materials/shaders on the ball mesh.
Now in Base Color, select Image Texture, and open "ball.tga".
Change render properties if you don't see the texture.

In Object Data Properties, in Vertex Colours, delete all vertex color slots ("-" button).

Now press A (select all) > Ctrl+A >All Transforms.
Now go to File > Export > glTF 2.0, create new folder for the exported file, select Format: glTF Separate, use filename "m222__X.gltf", where X is a ball model ID which you want to replace, Export.

-----
Now, only for FIFA 07: change material name to "ball [LitTexture2x]" (we don't want any reflections on far-distance model).
-----
8) Export again, but use filename "m316__X.gltf" (far-distance model).
As a result, you will have: "m222__X.gltf", "m222__X.bin", "m316__X.gltf", "m316__X.bin", "ball.png".
9) Open the folder with .gltf file and delete "ball.png". Copy "ball.tga" to this folder and rename this copied "ball.tga" to "ball@t99__X.tga", where X is a ball model ID which you want to replace.

Last edited:

